 English
 Русский
 Português
 Español
 Հայերենով
 Türkçe
 Български
 中文
中文 ქართული
 Français
 日本語
日本語 Қазақ
ҚазақThe "Configuration" section is intended for specifying technical settings of the program.
The "Configuration" section contains the following subsections:
- "Mail server",
- "Components and coordination",
- "Data recovery",
- "Safety",
- "Accounts".
Mail Server
Subsection "Mail server" need to enter the settings of the server that will deliver reports on e-mails.
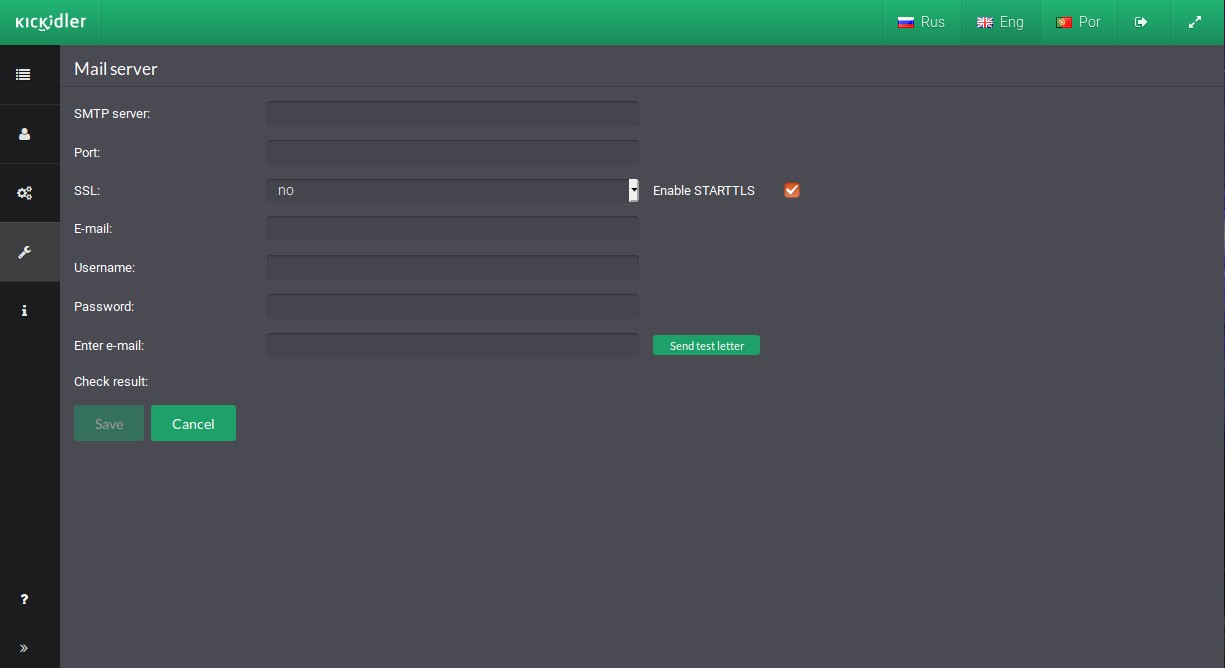
To connect the mail client, in the "Mail server" subsection fill in the following fields:
- Address — SMTP server address,
- Port,
- Using SSL - we recommend using “Yes” or STARTTLS,
- E-mail,
- Username — account, username or e-mail address for authorization,
- Password — password for authorization
and click on the “Save” button.
To check the correctness of the specified settings, fill in the "Enter e-mail" and click on the "Send test letter" button. If the verification result is "e-mail was sent successfully", the entered settings are correct.
To cancel unsaved mail server settings, click on the "Cancel" button.
After specifying the correct settings of the mail server, go to the "Reports’ mailing" section of the "Settings" section to create tasks for sending reports.
Components and coordination
Attention!
If all of your licenses are Kickidler Time Tracking, this software version doesn’t allow for managing video storage settings or working in the viewer. If you want to work with videos and use the viewer, you need to buy Kickidler Employee Monitoring licenses in your Personal Account and assign them to the grabbers.
The section “Components and coordination” is designed to display and manage installed program components. The section “Components and coordination” is consist of four subsections: “Servers”, “Grabbers”, “Viewers”. The transition between the sections is carried out by switching the tab buttons of the section “Components and coordination”.
Servers
The “Servers“ subsection contains basic information about all installed in the organization server components (Servers) of the software complex.
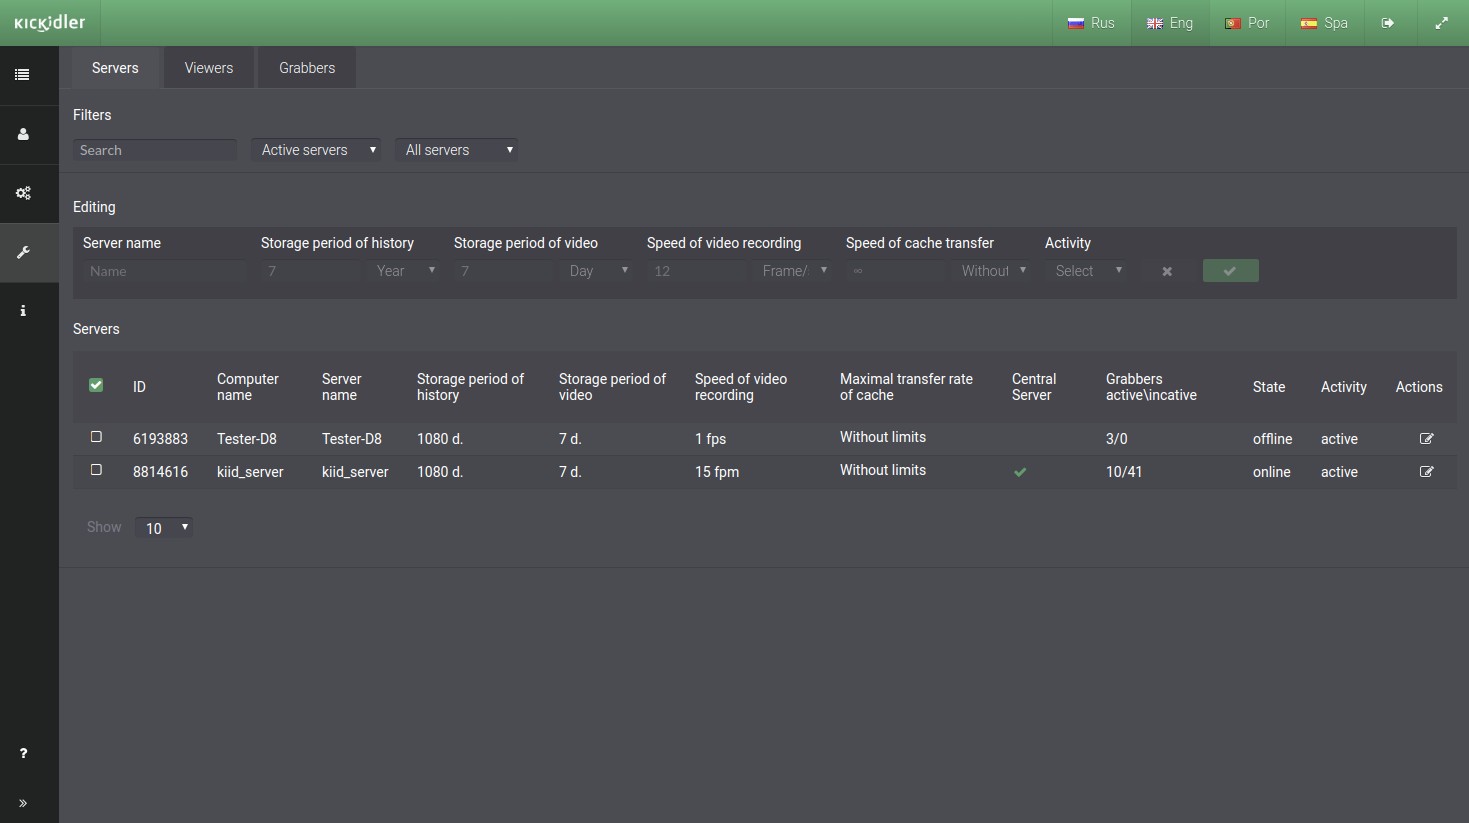
Subsection contains such information as:
- Server IDs,
- Up-to-date names of the computers where the Servers has been installed,
- The Servers names (by default names of computers, but you can change the name manually),
- Period of history storage on the Server (during this period server stores information on keystrokes and applications usage by employees)
- The period of video storage on the Server (during this period server stores video by activity of employees),
- Video capture rate (speed of video recording of employees’ activity on Grabbers attached to the Server),
- Maximum speed of receiving data from Grabbers’ cache (the Server speed of receiving cached information from Grabbers),
- Information about Server centrality,
- The number of Grabbers that are connected to the specified Server,
- Server status (if the Server is running, the status is online),
- Server activity (if the Server has no attached Grabbers and it has not been started during the week, the Server activity will be disabled automatically).
By default only active Servers are displayed in the table. If you want to see inactive or all Servers, use the filter above the table.
You can change the name of servers, their settings, turn them on and off.
To do that, carry out the following actions:
- Find Server in the table,
- Choose Server from the table,
- Change necessary parameters in the menu,
- Confirm changes.
Attention!
Turn off the activity of the Central Server is impossible.
The default settings for each server are as follows:
- 3 years as a period of history storage on the Server,
- 7 days as a period of video storage on the Server,
- 1 FPS as video capture rate,
- Maximum speed of receiving data from Grabbers’ cache is without restrictions.
Viewers
The «Viewers» subsection contains basic information about all installed in the organization components for viewing information on employees (Viewers).
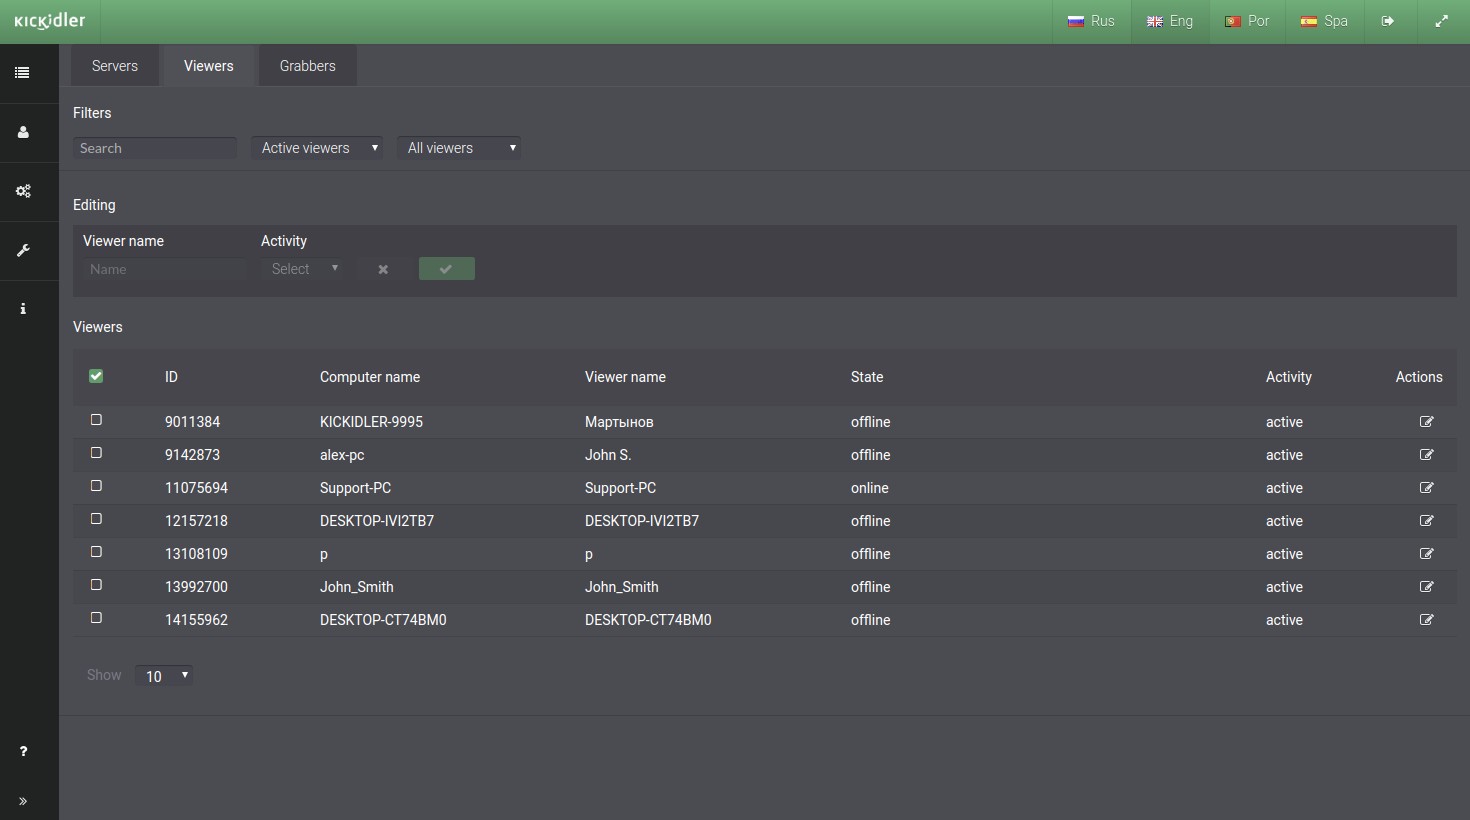
Subsection contains such information as:
- Viewers IDs,
- Up-to-date names of the computers where the Viewers has been installed,
- The Viewers names (by default names of computers, but you can change the name manually),
- Viewer status (if the Viewer is running, the status is online),
- Viewer activity (if the Viewer has not been started during the week, the Viewer activity will be disabled automatically).
By default only active Viewers are displayed in the table. If you want to see inactive or all Viewers, use the filter above the table.
You can change the name of Viewers, their settings, turn them on and off.
To do that, carry out the following actions:
- Find Viewer in the table,
- Choose Viewer from the table,
- Change necessary parameters in the menu,
- Confirm changes.
Grabbers
The «Grabbers» subsection contains basic information about all installed in the organization components for collecting data from employees ' computers (Grabbers).
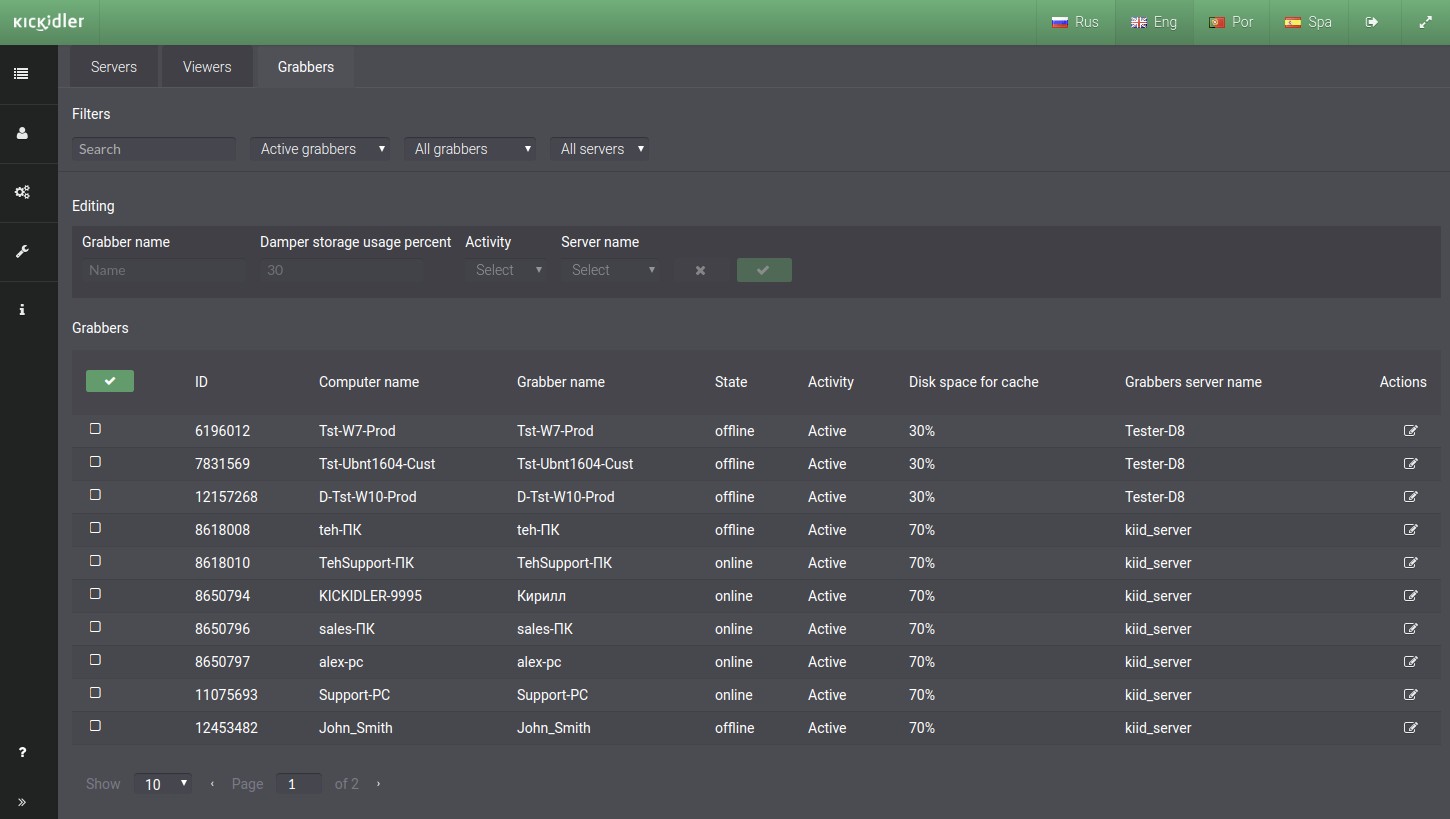
Subsection contains such information as:
- Grabbers’ IDs,
- Up-to-date names of the computers where the Grabbers has been installed,
- The Grabbers’ names (by default names of computers, but you can change the name manually),
- Grabber status (if the Grabber is running, the status is online),
- Grabber activity (if the Grabber is not assigned a license (demo, trial or purchased) and it has not worked for more than a week, the activity of the Grabber will be disabled automatically),
- Disk space for cache (0% by default, the amount of disk space with Grabber, which can be used to cache information if there is no connection between the Grabber and its Server),
- Grabbers' server name (the Server to which the Grabber sends data for further storage).
By default only active Grabbers are displayed in the table. If you want to see inactive or all Grabbers, use the filter above the table.
You can change the name of grabbers, their settings, turn them on and off.
To do that, carry out the following actions:
- Find Grabber in the table,
- Choose Grabber from the table,
- Change necessary parameters in the menu,
- Confirm changes.
Attention!
You cannot disable activity of the Grabber with license. If disabled Grabber is gotten license, it becomes active automatically.
By default, Grabbers are attached to the Central Server. The grabber sends all the information collected from the computer to the Server to which it is attached.
To link Grabber to another Server of the company, edit Grabber’s settings by choosing another Server
Data recovery
Subsection “Data recovery” is used for backup of the central information and its recovery from the backup copy. Such information includes:
- structure of the organization,
- evaluation of efficiency,
- filters on violations,
- coordination scheme component,
- settings of the e-mail server,
- already created mailing newsletters.
Attention! Collected video and information for reports don't get backed up.
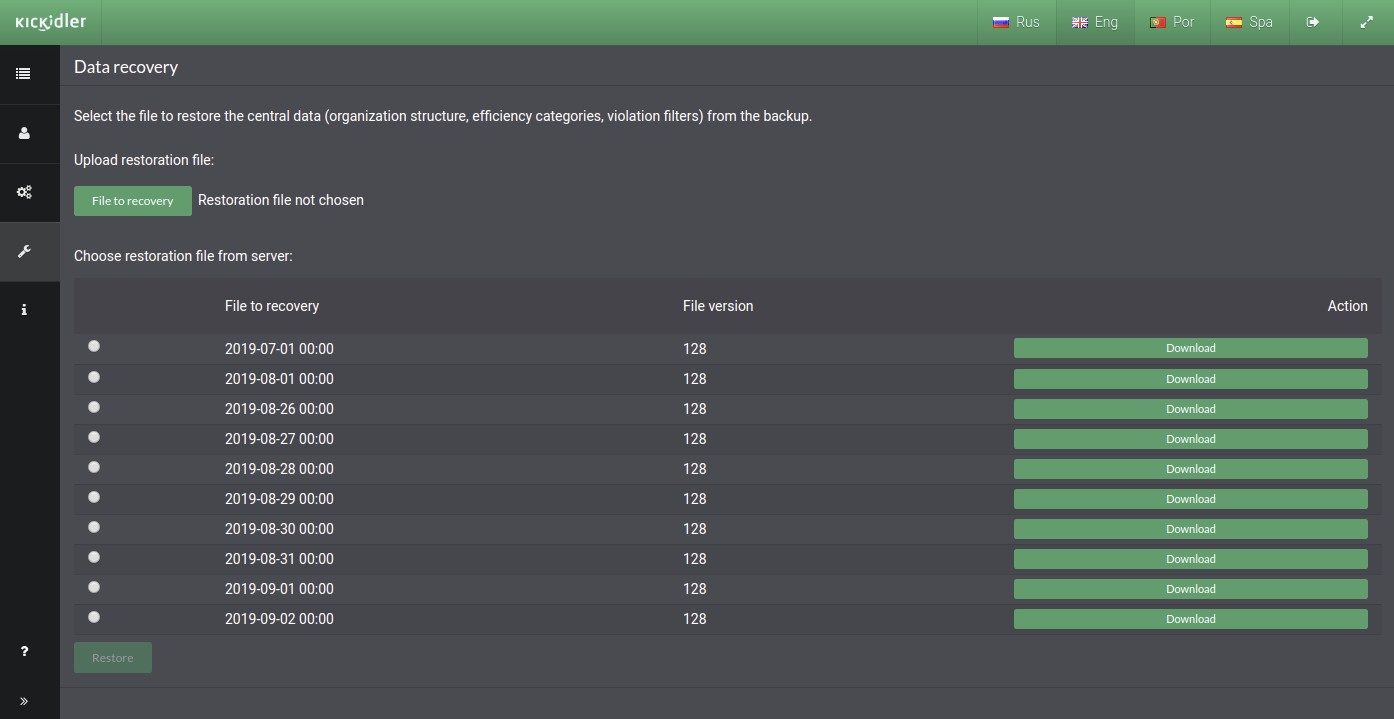
By default files for recovery are stored on the server.
To download any file for recovery, press the “Download” button across from the file you need.
You can recover central information from the given list for the last seven days or for the first days of the last six months.
Ways of recovery:
- Selecting the file for recovery from the given list,
- Loading the file for recovery from your file system to do it, press the “Load the File for Recovery” button,
Then press the “Recover” button and wait for information on the results of recovery.
Security
Subsection “Security” is used for setup of safe connection for web interface of the Central Server.
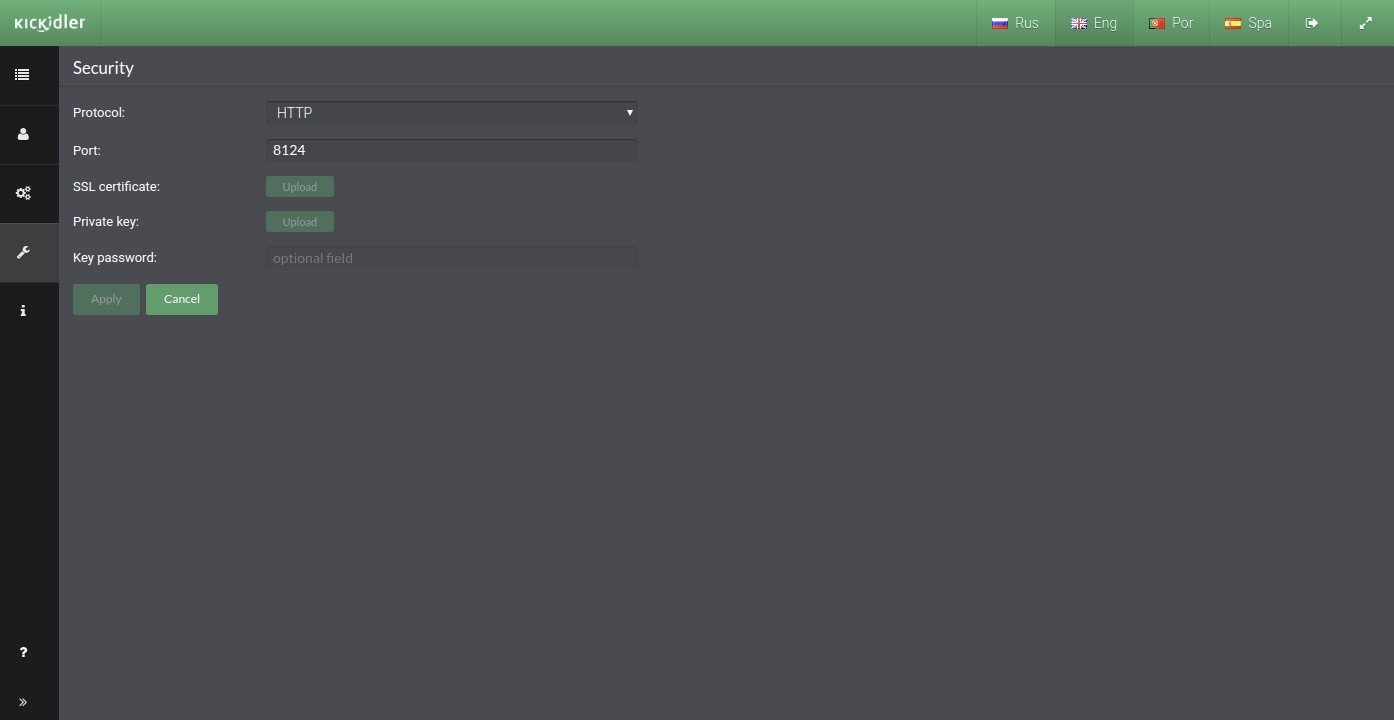
To manage security of the web interface of the Central Server, configure the following settings in the section “Security”:
• Protocol – if you want to use safe connection, you will select the https protocol,
• If necessary, change port for the Web server,
• Load the SSL certificate,
• Load the private key for the certificate,
• If necessary, insert the password of the private key,
and press the “Apply” button.
To cancel security settings that haven't been saved, press the “Cancel” button
Attention! You will have to confirm the changes you make. If confirmation for the changes doesn't arrive, the setback to the previous settings will happen in 30 seconds.
Accounts
The "Accounts" subsection is essential for configuring accounts for the Central Server. Accounts allow multi-user access and separate user rights on the Central Server.
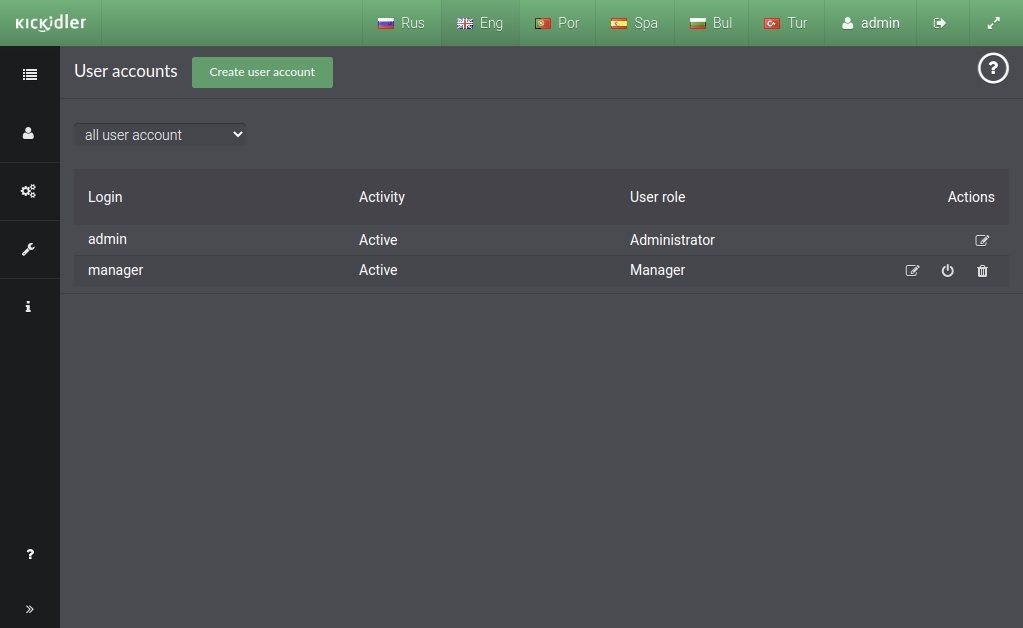
This subsection contains a table with existing accounts in the program.
The following steps can be performed in this subsection:
- Creating accounts,
- Editing accounts,
- Deleting accounts,
- Managing account activity.
Login creation rules
When creating an account login, the following requirements must be met:
- Login cannot be blank,
- Login must be 3-30 symbols long.
You can use the following to create a login:
- Letters (a-z), (A-Z),
- Numbers (0-9),
- Special characters (dash (-), underscore (_), dot (.), at sign (@).
Account types
To restrict the user rights on the Central Server, the program uses user roles.
The following user roles are available in the program:
- Administrator - full access to all sections of the Central Server,
- Manager – access to the "Reports" section, to the "Productivity" and "Calendar" subsections in the "Employees" section, given the limited visibility of employees.
Managing accounts
To create an account:
- Click the “Create Account” button,
- Enter the username for your new account,
- Enter your password and repeat password,
- If necessary, enable the requirement to change your password the first time you log in,
- Select the user role,
and click OK.
Once added, the new account will appear in the table and the user of that account will be able to log in to the Central Server.
To edit an account:
- Select an account you want to edit in the table,
- Click the “Edit Account” button,
The following account parameters can be edited:
- Password,
- Requirement to change the password the next time you log in,
- User role,
Click the "Apply" button for each setting you change.
To change the account activity:
- Select an account with the activity you want to change in the table,
- Click the “Disable Account Activity” / “Enable Account Activity” button,
- In the dialog box, click OK.
If you disable the account activity, access to the Central Server for the user of that account will be suspended. If you enable activity, it will be resumed. By default, all new accounts are created with activity enabled. The activity can be disabled automatically if there is an exceeded attempt to enter invalid passwords according to the Password policy.
To limit the employee visibility for an account:
- Select an account for which you want to restrict employee visibility in the table,
- Click the “Configure Employee Visibility” button, and you will be taken to the appropriate section.
To delete an account:
- Select an account you want to delete in the table,
- Click the “Delete Account” button,
- Click OK in the dialog box.
Password policy
The Password Policy section is required for managing password creation rules for the Central Server.
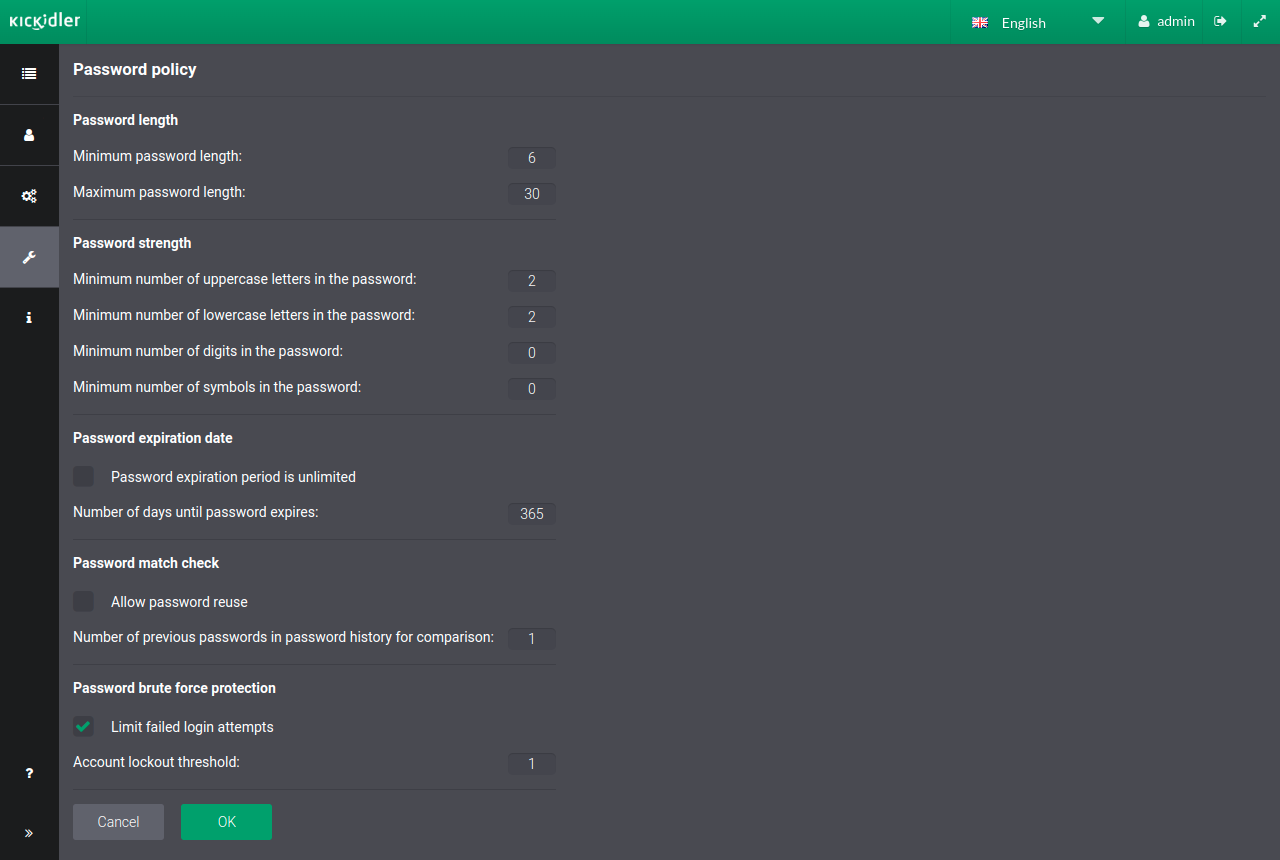
The password policy allows you to configure the password complexity, set its expiration date, prevent the reuse of old passwords, as well as protect the account from brute-force attacks.
Default settings
The default password policy has the following settings:
- Password length of 6 to 30 characters
- At least 1 upper case letter
- Password expiration time not limited
- Reuse of old passwords allowed
- No limit on the number of password attempts
Managing password policy
The password policy can be configured as follows:
- Changing the password length requirement by setting the minimum and maximum lengths,
- Changing password complexity requirements, such as:
- Configuring the number of upper and lower case letters,
- Setting the number of digits in the password,
- Setting the number of special characters (~ ! @ # $ % ^ & * _ - + = ` | \ ( ) { } [ ] : ; < > , . ? ' ")
This section allows you to set a password expiration date after which the password becomes obsolete and the system requires the user to change the password. To do this, turn off the unlimited password validity permission and specify the number of days after which the system will ask the user to change the password.
The system can prohibit reusing old passwords. To do that, remove the permission for reusing old passwords and set the period of storing old passwords in the history. The system will match the new password to the old ones and prohibit using the same password if they are the same.
With this section, you can set up the account protection against password brute-force attacks. To do this, enable the limit on the number of password attempts and specify the number of attempts, after exceeding which the account will be deactivated.
After making all the necessary changes, click OK.